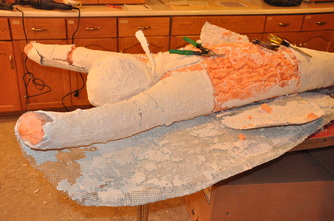
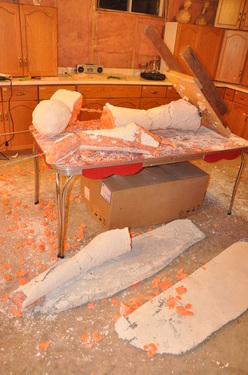
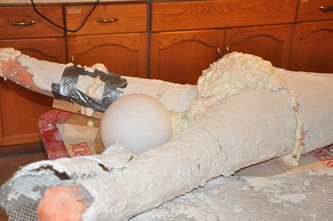
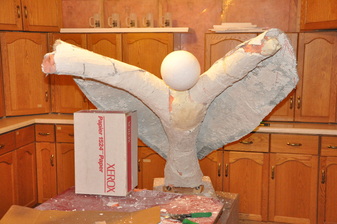
 Unfortunately the sculpture didn't loose enough weight drying out. It's still over a hundred pounds and will weigh over two hundred when finished, making it too heavy for frequent moves. Reluctantly I decided to reduce it from 7' long down to 5' long.  I cut about 6" from each wing tip and 1'-6" out of the torso. The top piece was about a foot wider than the bottom which prevented me from simply attaching them together. Instead I had to cut a foot out from between the arms and move the two arms together. This meant the head was gone. No worries, it was too large for the 5' sculpture anyway. I found a Styrofoam ball the right size and attached that to a threaded rod wedged between the two arms. This is what it looked like when in pieces: base, arms, wings and head.  After sliding cardboard spacers under each piece to create proper alignment I wired and taped the pieces in place and sprayed the gaps full of foam then let it dry.  With a sharp knife I carved off the excess foam. Next I covered the new foam with wire mesh. Now it's ready to solicit volunteers to help applying more Winterstone clay. Let me know if you're interested in stopping by to apply a couple cups of clay.
4 Comments
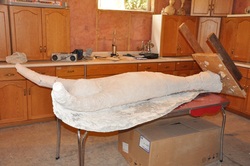 After waiting a few weeks for the Ascending Spirit sculpture to dry out, Justin came over to help me carry it from the garage into the basement studio. What a challenge that turned out to be! First, it still weighed over a hundred pounds and second, it was so large that it required careful maneuvering to get through the doors and halls. Originally I picked up the top end while Justin lifted the base then when I noticed that I was straining under the weight and he found it easy, I suggested that we switch ends. He willingly obliged. I could easily hold the wood base while he had to hug the sculpture's wings and endure pricks from protruding mire mesh ends. Getting out of the garage was easy. Carrying it through the front door and down the hall was challenging. (I scratched the paint in the hall and now need to patch it up.) Carrying the sculpture down the stairs into the basement border lined on impossible but we made it. By the end we were both sweating and Justin displayed numerous bloody scratches on his hands and arms. Everyone knew that if it got any heavier and bigger there was no way to get it out of the basement. The quandary was in deciding what to do next. The fact that it was still so heavy surprised me and I wondered if the clay was still heavy from water weight. Maybe if we waiting a few more weeks it would become light enough to carry. I crossed my fingers and decided to wait while monitoring its weight loss. 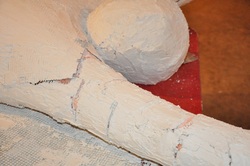 The sculpture suffered a lot of cracks during the move from Art on the Street to my house and the chips of loose WInterstone fell out while we carried it into the basement. I'm sure it can be fixed if we decide to proceed. Plan B is to remove the top half of the sculpture and replace it at a smaller scale. Being so much work, I hope we don't have to resort to Plan B. 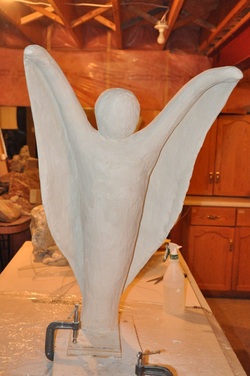 In the mean time I'm working on the scale model which is only 85 cm high. The Winterstone clay layers are almost complete and ready for the icing layers to be installed. 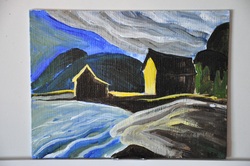 I also found some time to try acrylic painting again. Flipping through a Group of Seven book I found two Lawren Harris paintings to make studies from. I painted them on small 6" x 8" boards that Donna Kramp gave me. Thanks Donna! 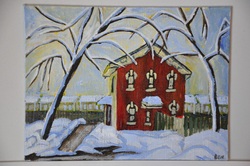 This is the other Lawren Harris study. Sondra liked it and will find a place for it on one of her walls. I'm happy it found a home. 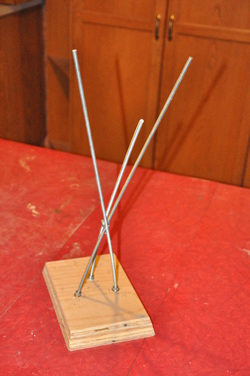 Like previous Winterstone sculptures, Ascending Spirit started with threaded rods attached to a wood base for the scale model. To achieve the desired end shape, the rods crossed near the bottom where the knees of the finished sculpture will be then spread out into three points. The outside rods would support the wings and the centre one would support the body. 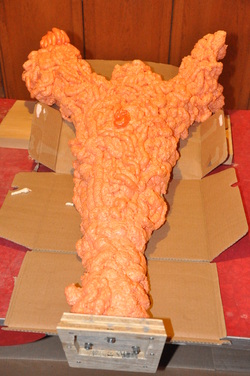 I spread out a cardboard backing, laid the frame on to and sprayed foam over the rods in the approximate shape of the sculpture plus extra to ensure there was plenty of foam to work with. 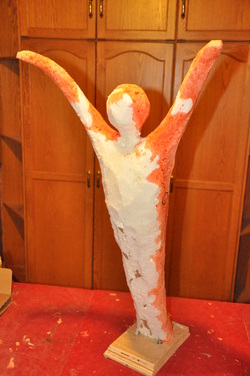 Once the foam was hard, I stood it up and carved away the unwanted material to reveal the final desired shape. There are two colours of foam because I used different types, trying to decide which worked best. When dry, the white was a bit too flexible while the pink was rigid. In the future I will stick with the pink spray. 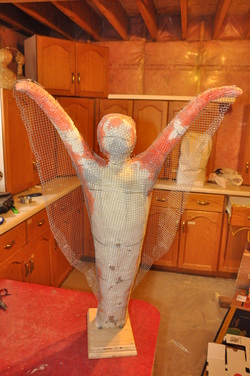 Next I wrapped wire mesh around the entire sculpture and added wire mesh wings. 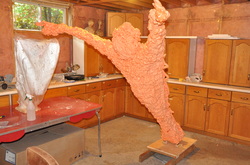 With the Art on the Street event rapidly approaching I stopped working on the scale model and created the under-structure for the full size sculpture. I checked to ensure that it was not too big to carry out of my basement studio. In theory it would be fine. In reality, when Sondra and Justin helped me carry it to Art on the Street it was almost too big to turn the corner in our basement and go up the stairs. Thanks to Sondra, we found a strategy that worked. Similarly the sculpture was almost too big to fit in the U-Haul van that I rented to transport it. When it is finished and the wing tips are fully extended I will need to rent a larger moving van. 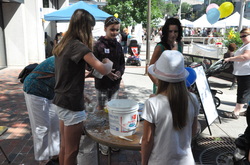 To help manage the volunteers mix and apply Winterstone clay at Art on the Street, I invited some of the people who demonstrated artistic skill when building the Paper Bag Princess sculpture. They were amazing assistants! Thanks to them all because I could not have done it without them. 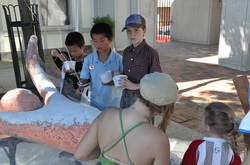 Over a hundred people participated applying cups of clay to the sculpture. We started with the sculpture laid on its back, making it easier to apply Winterstone to her front. 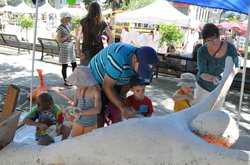 It was challenging applying clay to the wings without having it drop through the mesh onto the ground. 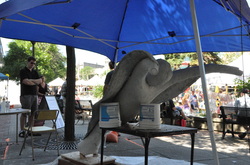 After two hours we turned the sculpture right side up and applied Winterstone clay to her back. The wet clay proved to be so heavy that it made the sculpture sag. To help hold the shape we wedged a table and pails underneath. For past sculptures I typically only added up to ten cups of clay at a time then let the clay harden before applying more. At Art on the Street we added about two hundred cups without giving the clay a chance to harden in place. I will need to come up with a plan of how to address this for future public participation events. 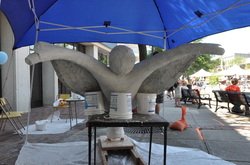 We stopped applying clay at 3:30 to give the sculpture a chance to harden before transporting it home. Unfortunately that was insufficient and it suffered a multitude of cracks but no worries, we can fix anything. We laid it on a plastic sheet on my garage floor and re-positioned the wings to the original flatter shape while placing a support under the back of her knees to create a less saggy pose. I am going to let her rest for a few weeks and harden into the correct shape. Then we will carry her down into my basement studio for rehab and more clay layers. 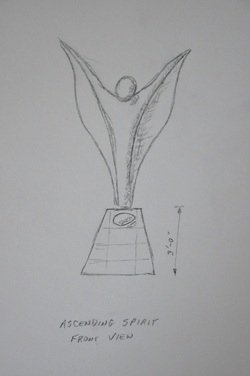 My next community sculpture is a white angelic spirit, about two metres high rising up from the pedestal which is covered with marble tiles. Beneath the sculpture is an egg symbolizing the spiritual and physical gifts left behind. I have not decided whether the egg will be white or tinted. Nor have I finalized who the culpture will be donated to, although I am building the under-structure ahead of time and the Winterstone layer will be applied with the help of anyone passing by at Guelph's Art on the Street event on July 13, 2013. Hopefully hundreds of people walking by will accept our invitation to mix and apply a cup of clay to the sculpture. Thank you to Sonya Poweska, Guelph Arts Council Executive Director who has been very helpful in my preparations preparing for the event. 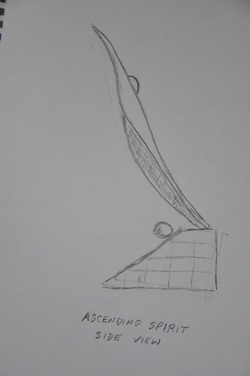 I need help with two major parts in this project. First, I need about six assistants on the day of Art on the Street to guide people mixing and applying a cup of Winterstone clay to the sculpture. Perhaps some of the participants who worked on the Paper Bag Princess sculpture will be available to step up to this new role. Second, I need someone(s) to help build the base for the sculpture. Although I could do it myself, it would be much better to involve the public in this part of the project too. If you know anyone who can build the wood frame or apply marble tiles to it, let me know. 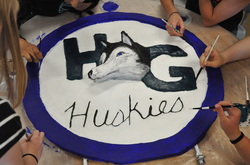 The Me to We Group at Heritage Glen helped paint the Husky sculpture. There were typically six of us painting at a time: two with white, two with blue, one with green and one with black. It was challenging to not lean in each other's paint while wet. The girls with long hair had an extra challenge of holding their hair with one hand while leaning over the sculpture to see properly while painting with the other hand. At one point I tried painting the black letters but my hand was too shaky to make clean straight lines. Lucky for me the students had steady hands and could do it expertly. To speed up the process we set up a fan to blow across the paint and speed up the drying. As a bonus it helped disperse the acrylic paint aroma. The painting started around 11:30 and I made the final brush stroke around 5:00. Fortunately we were able to apply multiple coats to create vibrant colours. I attached a base to the sculpture to make it stand up vertically and went to take a picture of the final creation but the camera's battery was dead. I will have to wait for the unveiling to take the final photo. Many wonderful pictures of the event were taken and I would like to post them but schools have privacy rules so I will have to settle for a single picture with lots of hands and brushes but no faces. 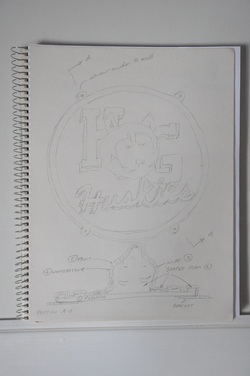 My daughter Sondra inspired this public sculpture by inviting me to create it with the grade four students at her school, Heritage Glen in Oakville. We met with her principal, Brent and VP Janet to brainstorm ideas and decided to create a relief of the school logo and make it about a metre in diameter and 10 cm thick. It would look like a giant coin protected by a display case and for added dynamics would be painted. It's difficult to see the proposal in this sketch due to the light lead in the pencil. Lesson learned. Future sketches should be made with dark lead or ink. 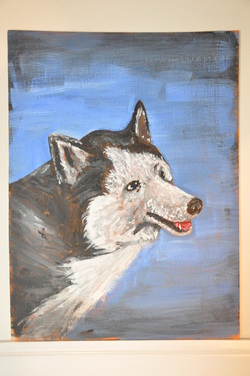 I have never painted a sculpture before but recall how often children asked about it when building the Paper Bag Princess sculpture. This was an ideal opportunity to give it a try. We all know that huskies are coloured grey and white... or is that black and grey and white? And we all know that the face is white and the back is dark but exactly where is the transition? To learn about a husky's appearance I decided to paint an acrylic picture of one using a YouTube video as teacher. 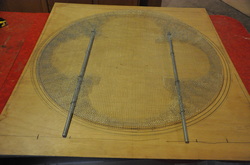 I found a sheet of plywood in inventory and cut it to 4' by 4' then drew a one metre circle on it. This was the template that I laid a sheet of wire mesh on. To convert the wire mesh shape from square to round I cut radial lines from the outside edges in to the circle then bent the strips of wire mesh in towards the centre. Using strips of wire, I attached two threaded rods to it that would eventually be bolted to a wood base. When I took a picture of the mesh I was surprised to see that the bent in wire strips had created a clover shape. Interesting! 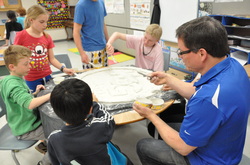 Sondra took care of organizing the event with the other grade four teachers at Heritage Glen. We set up a work area in the back of her classroom and had the children stop by in groups of four or five to each mix a cup of Winterstone clay and apply it to the sculpture. In total we had about 60 children participating. 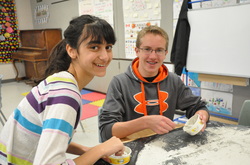 Six senior students were my assistants during the event, helping grade fours mix and apply the clay so that I could focus on the sculpture's growing shape. I could not have done it without them. Many thanks! 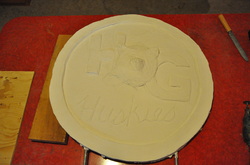 By the end of the day the sculpture was supposed to be complete except for minor touch ups. But there was one problem. Actually it was a very big problem. The display case that would eventually hold the sculpture limited how wide the sculpture could be. This limited how long the husky's nose could be. To all of our dismay we discovered that a husky with a short nose looked a lot like a pig. 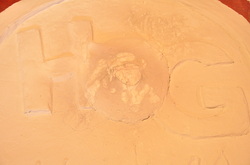 I took the sculpture home and decided to change the direction that the husky was looking. To show it's long nose the husky had to face sideways. I used my Dremmel tool to cut off the pig like features so that I could turn the head sideways. This necessitated that I remove the nose, ears and under the neck. 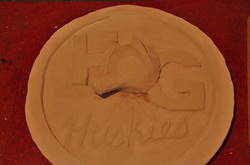 I shaped a wire mesh nose and attached it to the sculpture using Winterstone clay then did the same for one ear. Each day I applied a cup or two of clay where needed until the husky shape was complete. We scheduled a day for the We to Me Group at Heritage Glen to paint the sculpture but I wanted to make sure that it would be successful. I made a small disc of Winterstone covered wire mesh for test painting. I wanted to make sure that the acrylic paint I bought would adhere properly and that my colour scheme worked. 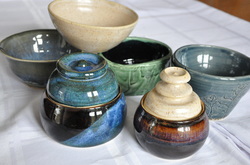 Between major sculpting projects I like recharging by trying different artistic mediums. One activity was to enroll in a wheel pottery class with my daughter Ashley. It has been many years since my last wheel class but it didn't take too many reminders to recall throwing techniques. I created two lidded vessels to replace the chipped sugar bowl that Pam and I now use. Experience has revealed that we tend to drop and break sugar bowl and lids so creating a spare seemed prudent. Ashley helped me select glazes which explains why Purple Spec, her favourite shows up in many single and double glazed pieces. 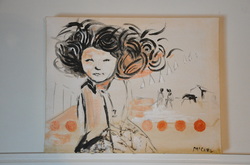 I decided to try acrylic painting to get some of the many images in my head onto pictures. Past experience with oils proved difficult, but that's no reason to not try acrylics. Using a picture by Ryan Price for reference I created this Exciting Hair painting. 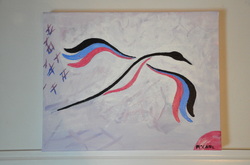 Simple paintings with dramatic curves such as those by Benjamin Chee Chee have always appealed to me. I flipped though my sketch book and found an interesting bird that I drew with coloured pens a few years ago at the cottage. Using it as a guide I painted the bird then went away and came back many times to revise it. The original colours were too harsh and the background too boring. In it's present state, part of me wants to add yellow to the centre area and part of me wants to leave it as is. At risk of ruining the painting, I decided to stop. 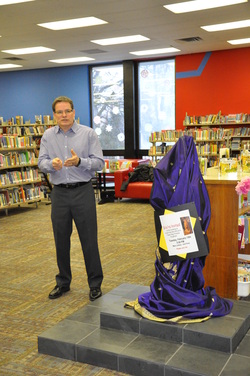 It was wonderful for me to see the familiar faces of people who helped build the sculpture at the unveiling. There were also many other interested people present: families, library staff, patrons, Board Members and Jessica Lovell from the Tribune. The fact that Robert Munsch joined us made the event extra special. It started with an introduction by Kitty Pope discussing the importance of Robert Munsch to our community and how this sculpture project started. I told the story of how the sculpture was built which was actually a five minute summary of my many blog posts with focus on personal experiences. Then came the big moment. I carefully unwrapped the sculpture and stepped back proudly. Everyone clapped. I beamed. Jennifer Mackie, Chair of the Library Board thanked me and the many people who helped with the sculpture. The many participants took turns posing with the Paper Bag Princess sculpture for pictures, photographing their own special memories. Some are shown below but many more were captured. This project was such a pleasure that I look forward to having the volunteer artists work with me again on future projects. Closing quote: "When this project started, it involved building a tribute to Robert Munsch. But, as I talked with the people building the princess, I realized we were building memories. When I saw the sparkle in their eyes as they smoothed the clay with their fingertips I realized we were also inspiring young artists. Listening to the chatter of strangers as they worked together I discovered that we were also building community. Building the Paper Bag Princess was much more than building a sculpture, it was about building pride, memories, artists, and strengthening our community.” 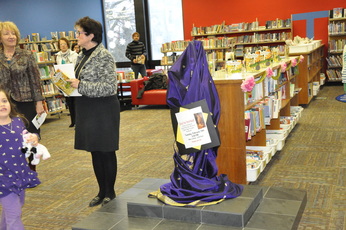 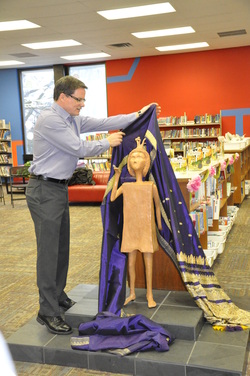 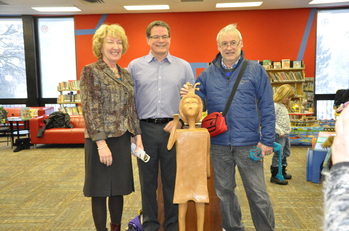 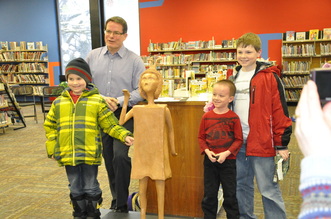 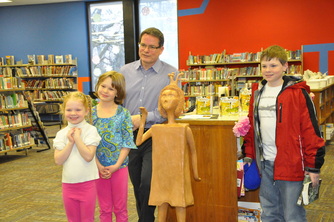 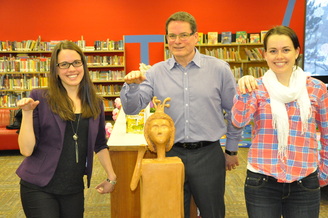 Leaving the Sculpture Attached to the Base - Throughout the project I have discussed progress and plans with my wife Pam during our morning coffee. When I told her about removing the sculpture from its base in preparation for the move to the library she reminded me that the GYMC sculpture called Celebration had the arm cracked during an incident when removed it from the base. To keep the Princess safe, it would be best to leave her attached to the upper base. It would be heavy and awkward to move, but that was the best option. 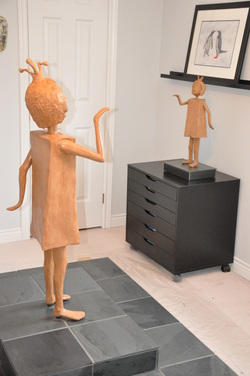 Photos of the Finished Sculpture - I took some photographs of the Princess, walking around the sculpture to get all angles and noticed in the one picture that it looked like the scale model sculpture was waving goodbye to the life size sculpture. How cute. Bronze Cast Quote - Winterstone was strong but the Paper Bag Princess' arms were so thin that there was a risk of being broken during an accident. As a backup plan I sent pictures to get a quote of how much it would cost to make a bronze cast. My worst case scenario was that if the sculpture got broken, I could patch her back together temporarily and have a bronze cast made for the library. The quote came back at $13,000. Wow! My addendum to the backup plan was to have someone fundraising to pay for the bronze cast if needed. 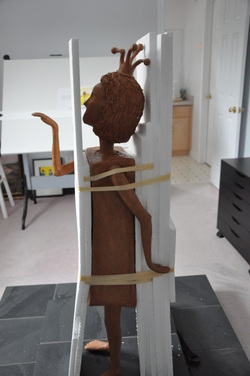 Moving to the Library - The library set up Mike Brimblecombe from Lightning Delivery to move the sculpture from the studio to the library. (I had not seen Mike in years but recognized the name from playing high school football together. In fact we knew each other from being in the same class long before high school.) He was willing to do the work but expressed concern that it might get damaged during the bumpy ride in the back of his truck. That evening I went into my basement, found some Styrofoam sheets, cut them to size and taped them to the sculpture. As long as we positioned her back to the truck wall, used straps to secure her in place and tucked blankets in where needed I was confident that the Paper bag Princess would survive the journey. On moving day Mike and his son carried the heavy pieces into his truck, secured them in place and drove to the library. I followed behind in my car. Kitty, Lisa and many other library staff guided us to the Paper Bag Princess' new home on the second floor of the downtown library. We put her in place then wrapped a large sheet around her to hide her until the unveiling. Commemorative Plate - I bought a brass plate from Champion's Choice and when I picked it up, asked them to place a couple more sticky strips to the back to keep it securely attached to the slate tiles. I knew that they would have to endure cleaning, bumping and possible picking for years. On my way home I stuck it to the base in front of the princess. I stood back and paused while thinking, "My time with you is almost over. Thanks for sharing this incredible adventure with me." I went over the entire sculpture a few final times touching up details. Each time I discovered new defects and realized that this art project had entered the "Eternal Tinkering Phase" where I was at risk of being consumed by tiny issues that were not important and that could delay its completion. I said to my self, "That's it. Call it done and stop making adjustments." In fact, I said it out loud so that I would hear myself. |
Ben McCarlThousands of potential sculptures lie within each and every uncut stone. Sometimes the destiny is obvious when I see a stone and sometimes releasing the sculpture within is a long journey following countless hints and inspirations. Archives
September 2013
Categories |