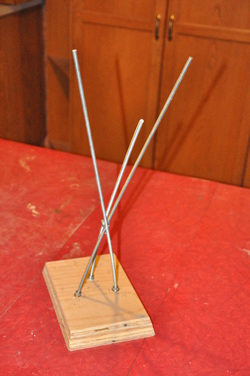
Like previous Winterstone sculptures, Ascending Spirit started with threaded rods attached to a wood base for the scale model. To achieve the desired end shape, the rods crossed near the bottom where the knees of the finished sculpture will be then spread out into three points. The outside rods would support the wings and the centre one would support the body.
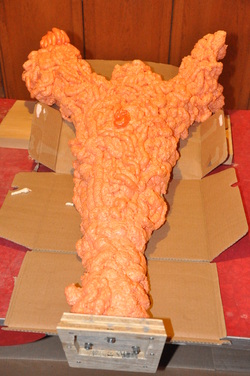
I spread out a cardboard backing, laid the frame on to and sprayed foam over the rods in the approximate shape of the sculpture plus extra to ensure there was plenty of foam to work with.
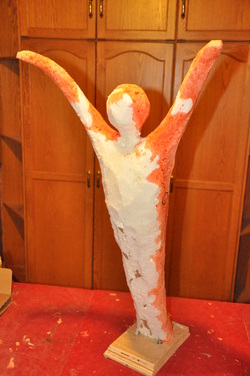
Once the foam was hard, I stood it up and carved away the unwanted material to reveal the final desired shape. There are two colours of foam because I used different types, trying to decide which worked best. When dry, the white was a bit too flexible while the pink was rigid. In the future I will stick with the pink spray.
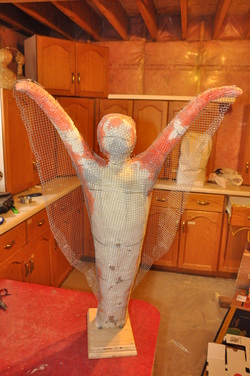
Next I wrapped wire mesh around the entire sculpture and added wire mesh wings.
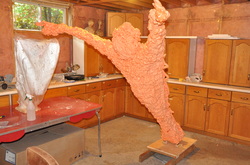
With the Art on the Street event rapidly approaching I stopped working on the scale model and created the under-structure for the full size sculpture. I checked to ensure that it was not too big to carry out of my basement studio. In theory it would be fine. In reality, when Sondra and Justin helped me carry it to Art on the Street it was almost too big to turn the corner in our basement and go up the stairs. Thanks to Sondra, we found a strategy that worked.
Similarly the sculpture was almost too big to fit in the U-Haul van that I rented to transport it. When it is finished and the wing tips are fully extended I will need to rent a larger moving van.
Similarly the sculpture was almost too big to fit in the U-Haul van that I rented to transport it. When it is finished and the wing tips are fully extended I will need to rent a larger moving van.
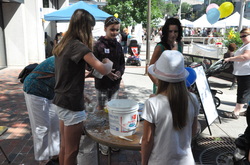
To help manage the volunteers mix and apply Winterstone clay at Art on the Street, I invited some of the people who demonstrated artistic skill when building the Paper Bag Princess sculpture. They were amazing assistants! Thanks to them all because I could not have done it without them.
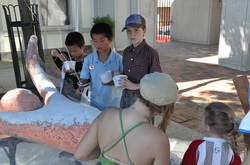
Over a hundred people participated applying cups of clay to the sculpture. We started with the sculpture laid on its back, making it easier to apply Winterstone to her front.
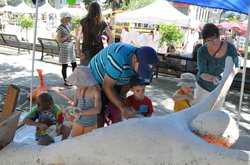
It was challenging applying clay to the wings without having it drop through the mesh onto the ground.
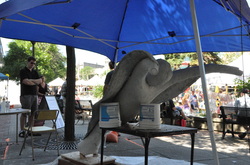
After two hours we turned the sculpture right side up and applied Winterstone clay to her back. The wet clay proved to be so heavy that it made the sculpture sag. To help hold the shape we wedged a table and pails underneath.
For past sculptures I typically only added up to ten cups of clay at a time then let the clay harden before applying more. At Art on the Street we added about two hundred cups without giving the clay a chance to harden in place. I will need to come up with a plan of how to address this for future public participation events.
For past sculptures I typically only added up to ten cups of clay at a time then let the clay harden before applying more. At Art on the Street we added about two hundred cups without giving the clay a chance to harden in place. I will need to come up with a plan of how to address this for future public participation events.
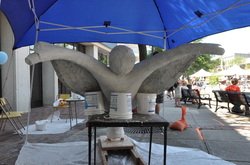
We stopped applying clay at 3:30 to give the sculpture a chance to harden before transporting it home. Unfortunately that was insufficient and it suffered a multitude of cracks but no worries, we can fix anything. We laid it on a plastic sheet on my garage floor and re-positioned the wings to the original flatter shape while placing a support under the back of her knees to create a less saggy pose.
I am going to let her rest for a few weeks and harden into the correct shape. Then we will carry her down into my basement studio for rehab and more clay layers.
I am going to let her rest for a few weeks and harden into the correct shape. Then we will carry her down into my basement studio for rehab and more clay layers.
 RSS Feed
