Ben McCarl
  • Home
  • Winterstone
  • Soapstone
  • Alabaster
  • Clay
  • Pictures
  • Blog
  • Contact

Unveiling the Paper Bag Princess Sculpture in Her New Home

2/20/2013

2 Comments

 
Picture
It was wonderful for me to see the familiar faces of people who helped build the sculpture at the unveiling.  There were also many other interested people present: families, library staff, patrons, Board Members and Jessica Lovell from the Tribune.  The fact that Robert Munsch joined us made the event extra special.

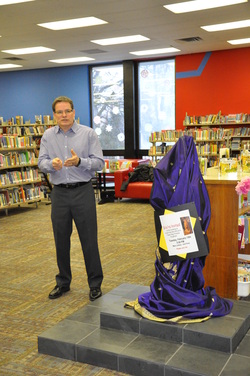
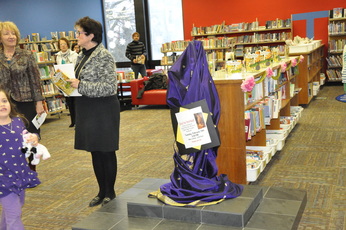
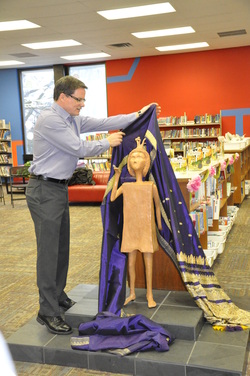
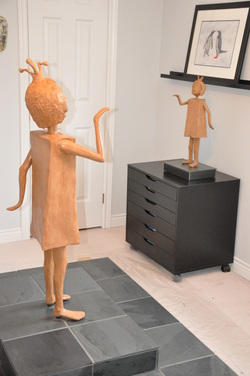
It started with an introduction by Kitty Pope discussing the importance of Robert Munsch to our community and how this sculpture project started.  I told the story of how the sculpture was built which was actually a five minute summary of my many blog posts with focus on personal experiences.  Then came the big moment.  I carefully unwrapped the sculpture and stepped back proudly.  Everyone clapped.  I beamed.  Jennifer Mackie, Chair of the Library Board thanked me and the many people who helped with the sculpture.

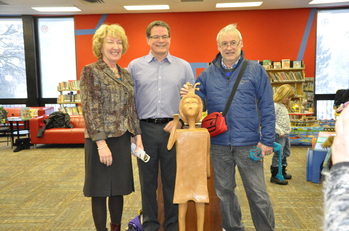
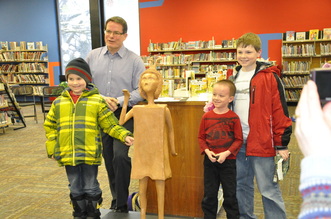
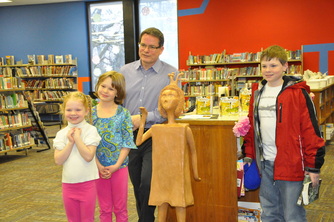
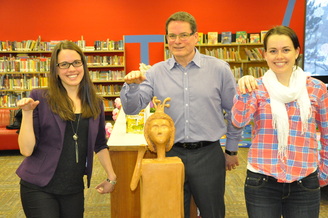
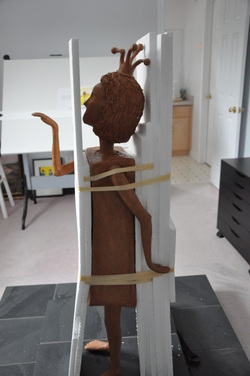
The many participants took turns posing with the Paper Bag Princess sculpture for pictures, photographing their own special memories.  Some are shown below but many more were captured.

This project was such a pleasure that I look forward to having the volunteer artists work with me again on future projects.

Closing quote: "When this project started, it involved building a tribute to Robert Munsch. But, as I talked with the people building the princess, I realized we were building memories. When I saw the sparkle in their eyes as they smoothed the clay with their fingertips I realized we were also inspiring young artists.  Listening to the chatter of strangers as they worked together I discovered that we were also building community. Building the Paper Bag Princess was much more than building a sculpture, it was about building pride, memories, artists, and strengthening our community.”

Picture

Picture
 

Picture

Picture
  

Picture
 

Picture
 

2 Comments

The Final Activities

2/15/2013

5 Comments

 
Leaving the Sculpture Attached to the Base - Throughout the project I have discussed progress and plans with my wife Pam during our morning coffee.  When I told her about removing the sculpture from its base in preparation for the move to the library she reminded me that the GYMC sculpture called Celebration had the arm cracked during an incident when removed it from the base.  To keep the Princess safe, it would be best to leave her attached to the upper base.  It would be heavy and awkward to move, but that was the best option.

Installing Slate Tiles - Since I have no experience installing slate tiles I referenced You Tube for guidance.  A quick trip to Canadian Tire was needed to buy some tools then I mixed the mortar, spread it over the wood base pieces and applied the slate tiles.


Sealing the Sculpture and the Slate Tiles - One of the tips I learned on You Tube was that slate was so porous that it needed to be sealed before grouting or it would suck the water out of the grout making it difficult to apply.  Using disposable paint brushes I painted sealer to the top of the crown then worked my way down the sculpture, over the hair, face, arms, bag, legs and feet.  Once satisfied that all runs and drips were fixed and all loose brush hairs plucked off the sculpture I sealed the slate tiles too.


Applying Grout - The next day I mixed some grout which was charcoal in colour and thought that this was a high risk activity, not a risk to the sculpture, but a risk to our house.  If I spilled the dark grout anywhere it would create a terrible mess and be very difficult to clean up.  Utmost care was needed and no accidents were allowed. Using a floating tool I pressed grout into the grooves between tiles and scrapped of any excess.  I wiped the tiles with a large wet sponge, wrung it out in a pail of water then repeated until the water in the pail was filthy.  Carefully I carried the pail from the studio which was upstairs in our home, down to the basement where I dumped it into the laundry tub, rinsed it out, refilled it with clean water then headed back upstairs.  It took about five trips of washing and dumping to wash the excess grout off the slate tiles.  The studio floor suffered a few charcoal splash drops but fortunately there was no spill crisis.  I ran out of grout when only two thirds of the grooves were filled.  I was tired and my back was fatigued and I knew that if I mixed another batch of grout there was a good chance of me spilling so I opted to wait and finish the following day.


One Last Polish - By rubbing an old cloth on the tiles I removed the faint residue of grout and made the slate shine again.  I thought about resealing the base to make the grout shiny too but decided that the contrasting sheens gave the base more texture.

Picture
Photos of the Finished Sculpture - I took some photographs of the Princess, walking around the sculpture to get all angles and noticed in the one picture that it looked like the scale model sculpture was waving goodbye to the life size sculpture.  How cute.

Bronze Cast Quote - Winterstone was strong but the Paper Bag Princess' arms were so thin that there was a risk of being broken during an accident.  As a backup plan I sent pictures to get a quote of how much it would cost to make a bronze cast.  My worst case scenario was that if the sculpture got broken, I could patch her back together temporarily and have a bronze cast made for the library.  The quote came back at $13,000.  Wow!  My addendum to the backup plan was to have someone fundraising to pay for the bronze cast if needed.

Picture
Moving to the Library - The library set up Mike Brimblecombe from Lightning Delivery to move the sculpture from the studio to the library.  (I had not seen Mike in years but recognized the name from playing high school football together.  In fact we knew each other from being in the same class long before high school.)  He was willing to do the work but expressed concern that it might get damaged during the bumpy ride in the back of his truck.  That evening I went into my basement, found some Styrofoam sheets, cut them to size and taped them to the sculpture.  As long as we positioned her back to the truck wall, used straps to secure her in place and tucked blankets in where needed I was confident that the Paper bag Princess would survive the journey.

On moving day Mike and his son carried the heavy pieces into his truck, secured them in place and drove to the library.  I followed behind in my car.

Kitty, Lisa and many other library staff guided us to the Paper Bag Princess' new home on the second floor of the downtown library.  We put her in place then wrapped a large sheet around her to hide her until the unveiling.

Commemorative Plate - I bought a brass plate from Champion's Choice and when I picked it up, asked them to place a couple more sticky strips to the back to keep it securely attached to the slate tiles.  I knew that they would have to endure cleaning, bumping and possible picking for years.  On my way home I stuck it to the base in front of the princess.  I stood back and paused while thinking, "My time with you is almost over.  Thanks for sharing this incredible adventure with me."

5 Comments

Being Very Careful

2/4/2013

1 Comment

 
I went over the entire sculpture a few final times touching up details.  Each time I discovered new defects and realized that this art project had entered the "Eternal Tinkering Phase" where I was at risk of being consumed by tiny issues that were not important and that could delay its completion.  I said to my self, "That's it.  Call it done and stop making adjustments."  In fact, I said it out loud so that I would hear myself.


The next day I approached the sculpture with a different attitude.  The sculpture was truly done in my mind and I could focus on finishing the base but first I wanted to make sure that the princess could be removed for transportation to the library.  I had to make sure that the threaded rods coming out of the princess' feet had not become stuck to the base by WInterstone.   Kneeling on the floor, I carefully dragged the upper base with the sculpture attached to the edge of the lower base, wriggled my fingers underneath and lifted up one side of the upper base.  The sculpture swung to an angle.  My heart skipped a beat.  I froze in place to evaluate the situation.  Carefully I tipped the base down slightly to find the balance point, slid my knee underneath then lowered the base to rest on my thigh.   With my left hand cradling the princess, my right hand picked up a wrench that I had placed on the floor nearby.  I moved my right hand and wrench under the base, found the threaded rods with my fingers and blindly put the wrench around a nut and gave it a gentle tug.  To my surprise the nut turned easily.  Wonderful.  I continued with the wrench until the nut turned freely then loosened the nut under the princess' other foot too.


Once the nuts and washers were off I sat the upper base down and stood up beside the princess.  Taking hold of the bag sides I lifted the sculpture, pulling the connecting rods out of the base.  Success.  She was safely in my arms. 


Before anything could go wrong, I reversed the steps and reattached the sculpture to the base, confident that it could be moved to the library when needed.
1 Comment

    Ben McCarl

    Thousands of potential sculptures lie within each and every uncut stone.  Sometimes the destiny is obvious when I see a stone and sometimes releasing the sculpture within is a long journey following countless hints and inspirations.

    Archives

    September 2013
    August 2013
    July 2013
    June 2013
    May 2013
    April 2013
    February 2013
    January 2013
    December 2012
    November 2012
    October 2012
    September 2012
    June 2012
    April 2012
    March 2012
    February 2012
    November 2011
    October 2011
    September 2011
    August 2011
    July 2011
    June 2011
    May 2011

    Categories

    All

    RSS Feed

Powered by Create your own unique website with customizable templates.