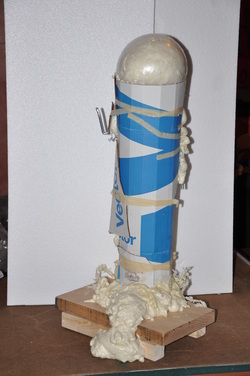
The spray foam kept falling off the metal frame, inspiring me to roll a cardboard tube around it to contain the flow. This worked great, although the foam expanded out the top far more than anticipated. No worries, it'll be easy to cut off.
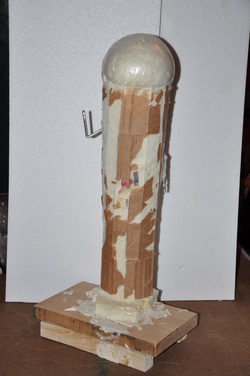
Stripping away the cardboard revealed the foam core which was ready for carving. At this point the sculpture looks more like a missile or robot or submarine on its end.
Shave off some foam with a sharp knife then go away for a while to contemplate. Return and repeat again and again until the princess emerges.
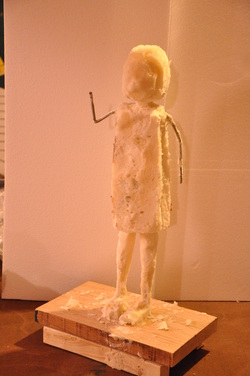
Some artistic deviations from the original picture are evident: the sculpture's feet are toeing inward rather than outward like the picture. I'm not sure which direction the final sculpture will be. The non-waving arm in the picture is crooked in front of the princess but I prefer the open impression of having it hanging behind her back instead.
Some artistic deviations from the original picture are evident: the sculpture's feet are toeing inward rather than outward like the picture. I'm not sure which direction the final sculpture will be. The non-waving arm in the picture is crooked in front of the princess but I prefer the open impression of having it hanging behind her back instead.
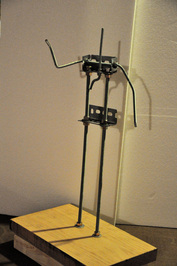
After more shaving to reduce the princess' head size her foam feet were removed. The build up of future layers of wire mesh, Winterstone and icing would have made the feet far too large if starting with a foam core so I start by cutting off the foam and building the feet from wire.
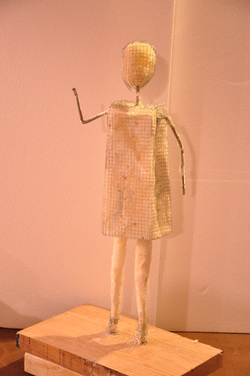
A difference: For my previous Celebration sculpture donated to the GYMC I pulled the wire mesh tight to the foam core but for the princess I'm trying a more relaxed fit. This should provide better structural strength by having ample Winterstone on both sides of the mesh. As a bonus, looser mesh was easier to install and saved my wrist from being hurt again. I damaged the lunate bone alignment in my right wrist while making the Celebration sculpture and it still hasn't quite healed.
A difference: For my previous Celebration sculpture donated to the GYMC I pulled the wire mesh tight to the foam core but for the princess I'm trying a more relaxed fit. This should provide better structural strength by having ample Winterstone on both sides of the mesh. As a bonus, looser mesh was easier to install and saved my wrist from being hurt again. I damaged the lunate bone alignment in my right wrist while making the Celebration sculpture and it still hasn't quite healed.
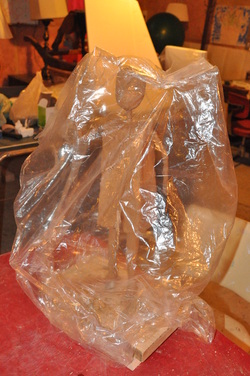
The first application of Winterstone went well. The princess was sprayed with water and covered with a plastic bag to let the stone cure hard.
 RSS Feed
